Slow Cooked, Meatless Taco Soup

unnamed

Prep time: 15  minutes          Cook time: 6 hours          Total time: 6.25 hours

About:

Happy Autumn, everyone! It is finally getting chilly here in Alabama, and I’ve been having a craving for taco soup, so here we are! I love everything about taco soup; it tastes like tacos and it’s a soup. What could be better? I used a slow cooker to prepare this soup, which, in my opinion, enhances the taste. It also makes this a “set it and forget it” type of soup, which is even better for lazy Sundays like today. You can cook the soup on high for 4 hours to speed things up, or you could prepare it in a stock pot to do it even faster. Whichever way you choose, I hope you like this meatless taco soup.

Ingredients:

1 packet of taco seasoning mix

1 packet of dry ranch mix

1 cup dry black beans

1 cup dry pinto beans

1 (14.5 oz) can corn

2 (14.5 oz) cans diced tomatoes

1 cup chopped carrots

1 large onion, chopped

4 cloves garlic, finely chopped

3  1/2 cups vegetable broth

1/4 teaspoon hot sauce

1  3/4 tablespoon cumin

1/2 tablespoon white pepper

1/2 teaspoon ground turmeric

1/2 tablespoon onion powder

1/2 tablespoon garlic powder

Salt and pepper to taste

Preparation:

  1. Chop the onion, garlic, and carrots.
  2. After chopping the onion, garlic, and carrots comes the really fun part; just dump everything into a slow cooker, including the seasonings (don’t drain the corn or tomatoes).unnamed (1)
  3. Cook the soup on medium heat in your slow cooker for approximately 6 hours, stirring every hour or so.
  4. Once 6 hours have passed and the beans are tender, you are ready to serve! I personally like mine with tortilla chips, cheese, chives, and sour cream. Get creative and eat well!
  5. unnamed (4)

Irish Soda Bread

unnamed 8

Prep time: 10 minutes          Bake time: 40 minutes          Total time: 50 minutes

About:

I am of Irish descent, and I suppose one night I felt like paying homage to my ancestors. It may not win a beauty contest, but this Irish Soda Bread is filling and tastes great (especially when drizzled with honey). It calls for very few ingredients and serves as a great side to any meal, especially soups. I served this with roasted potatoes and pinto beans (one of my favorite meals). So if you like a good, hearty, rustic bread, give this recipe a chance.

Ingredients:

Non-stick cooking spray

4 cups flour

1  1/8 teaspoon baking soda

1  1/4 teaspoon salt

1  1/2 cup milk

1  1/4 tablespoon vinegar

Note: You may use buttermilk instead of combining milk and vinegar; it would make things easier, but I never have buttermilk on hand so I use a substitute. I can’t tell a difference.

Preparation:

  1. Preheat your oven to 425 degrees. While the oven is heating up, start by pouring the milk into a bowl and stirring in the vinegar. Stir well and let this sit for at least 5 minutes.
  2. While the milk is sitting, combine the flour, salt, and baking soda into a large mixing bowl.
  3. Once the milk has been sitting for about 5 minutes, stir the milk and vinegar mixture into the mixing bowl with the dry ingredients. You may use a mixer, but I just use a good wooden spoon to stir everything together until it is blended.
  4. Once the oven has preheated, spray a baking sheet with non-stick cooking spray. Remove the dough from the mixing bowl and form it into a large ball. Flatten it a little, but not too much. You don’t want flat bread, you still want a nice, rounded shape. Once you have shaped it, cut a cross into the top of the dough.
  5. Place into the oven and bake for 40 minutes.
  6. Remove from the oven, serve, and enjoy!

Popcorn Popped in Coconut Oil and Seasoned with Honey and Ground Cinnamon

unnamed

About:

I must confess, I am a popcorn fanatic. This recipe may not really be a meal or side dish, but it is yummy! It’s the perfect combination of sweet and salty. It’s a fast and tasty snack to make when you want popcorn, but you want something different.

Ingredients:

1/2 cup popcorn kernels (any brand)

2  1/2 tablespoons coconut oil (any brand)

2 tablespoons honey

Cinnamon to taste

Salt to taste

Preparation:

  1. Spoon the coconut oil into the bottom of a large saucepan. Stir it around a bit to make sure it coats the bottom.
  2. Pour in the kernels. Most stove-top popcorn recipes tell you to only add 3 kernels at first and pop them, but I’m impatient and always skip that step and just dump all the kernels in there.
  3. Bring heat to medium-high and cover the saucepan with a lid so you don’t have to dodge popcorn shooting around your kitchen. It may take between 3-5 minutes before you hear any popping going on under there, but that’s fine. Just hang in there.
  4. Once it begins to pop consistently, gently shake the bottom of the saucepan with the handle to stir the kernels around a bit. I don’t actually know if this does anything, but I watched my parents do this when I was a kid, so I do this after their fashion.
  5. Once the popping has stopped, remove the popcorn from heat.
  6. Pour the popcorn into a large mixing or serving bowl. Drizzle with honey and sprinkle the cinnamon and salt to your taste (I went heavy on cinnamon and easy on salt).
  7. Serve and enjoy!

Baked Eggplant Parmesan

unnamed (7)

Prep time: 15 minutes          Cook time: 65 minutes          Total time: 80 minutes

About:

I had never made (well, actually, I’d never eaten) eggplant Parmesan before the other night. I had always baked eggplant or added it into stir fry. So, I decided to tackle something new. This recipe is not difficult to make, however, it is time consuming. I recommend making this dish on a night on which you have some free time, such as a weekend. It will be worth your time, though! I was very impressed with this recipe and it is one that I will make again and again.

Ingredients:

1 large eggplant, peeled and cut into slices

1 (29 oz) can tomato sauce

2 cups shredded mozzarella cheese

3/4 cup Parmesan cheese

2/4 cup Italian breadcrumbs

1/4 cup regular breadcrumbs

1/2 large white onion, chopped

4 cloves garlic, finely chopped

2 eggs

2  1/2 tablespoons water

1/2 tablespoon dried oregano

2 teaspoons dried basil

1 tablespoons Italian seasoning

1/2 tablespoon garlic powder

1/2 tablespoon onion powder

Salt and pepper

Non-stick cooking spray

Instructions:

  1. Alright, let the fun begin! Start the fun by preheating the oven to 375 degrees. While the oven is preheating, peel and cut your large eggplant (shape doesn’t matter as long as the pieces aren’t too thick to crisp while baking).
  2. Once you’ve chopped up your eggplant in a desirable fashion, whisk two eggs in a mixing bowl. Add the water to the whisked eggs and whisk together for togetherness. Set aside.
  3. In a larger but separate mixing bowl, add the 2/4 cup Italian breadcrumbs, 1/4 cup regular breadcrumbs, 3/4 cup Parmesan cheese, 1/2 tablespoon oregano, 1 teaspoon dried basil, and salt and pepper to taste. Mix this together (I used my hands because it was more fun than using a fork or spoon).
  4. Get out a large baking dish and coat it with nonstick cooking spray.
  5. Now’s the time to dip. Take each individual slice of peeled eggplant and dip it into the egg and water mixture. Give it a careful shake to rid of the excess, then dredge it through the mixture of breadcrumbs, Parmesan cheese, and seasonings. Once it’s coated well, place onto the baking sheet. Do this with every single piece of eggplant. Arrange them on the baking sheet so that they do not touch or overlap.
  6. Once you’ve got every piece of eggplant breaded, pop the baking sheet into the oven and let the eggplant bake for 23 minutes on each side. So set your timer for 23 minutes, flip the eggplant pieces, and bake the other side for another 23 minutes. This makes 46 minutes total baking time.
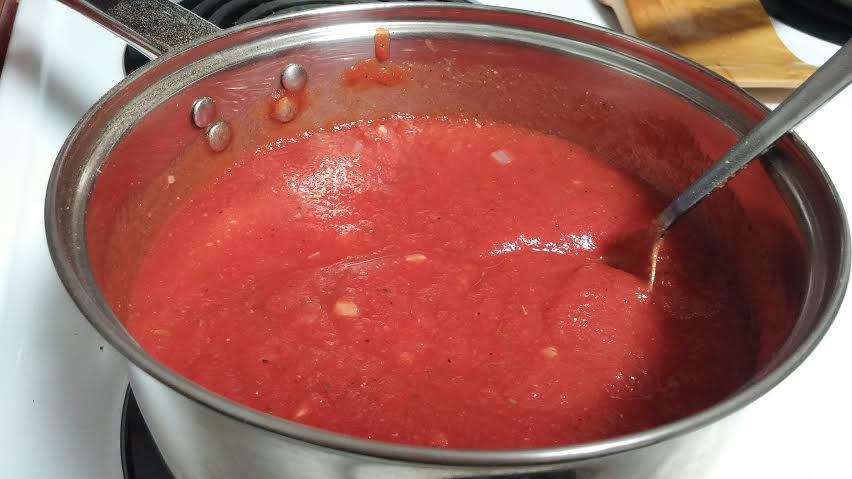
  7. While the eggplant pieces are baking, it’s time to focus on the sauce. If you have not done so already, chop the onion and garlic. Spray a skillet with nonstick cooking spray and saute the onion and garlic until the onion is clear and the garlic is fragrant, about 5 minutes.
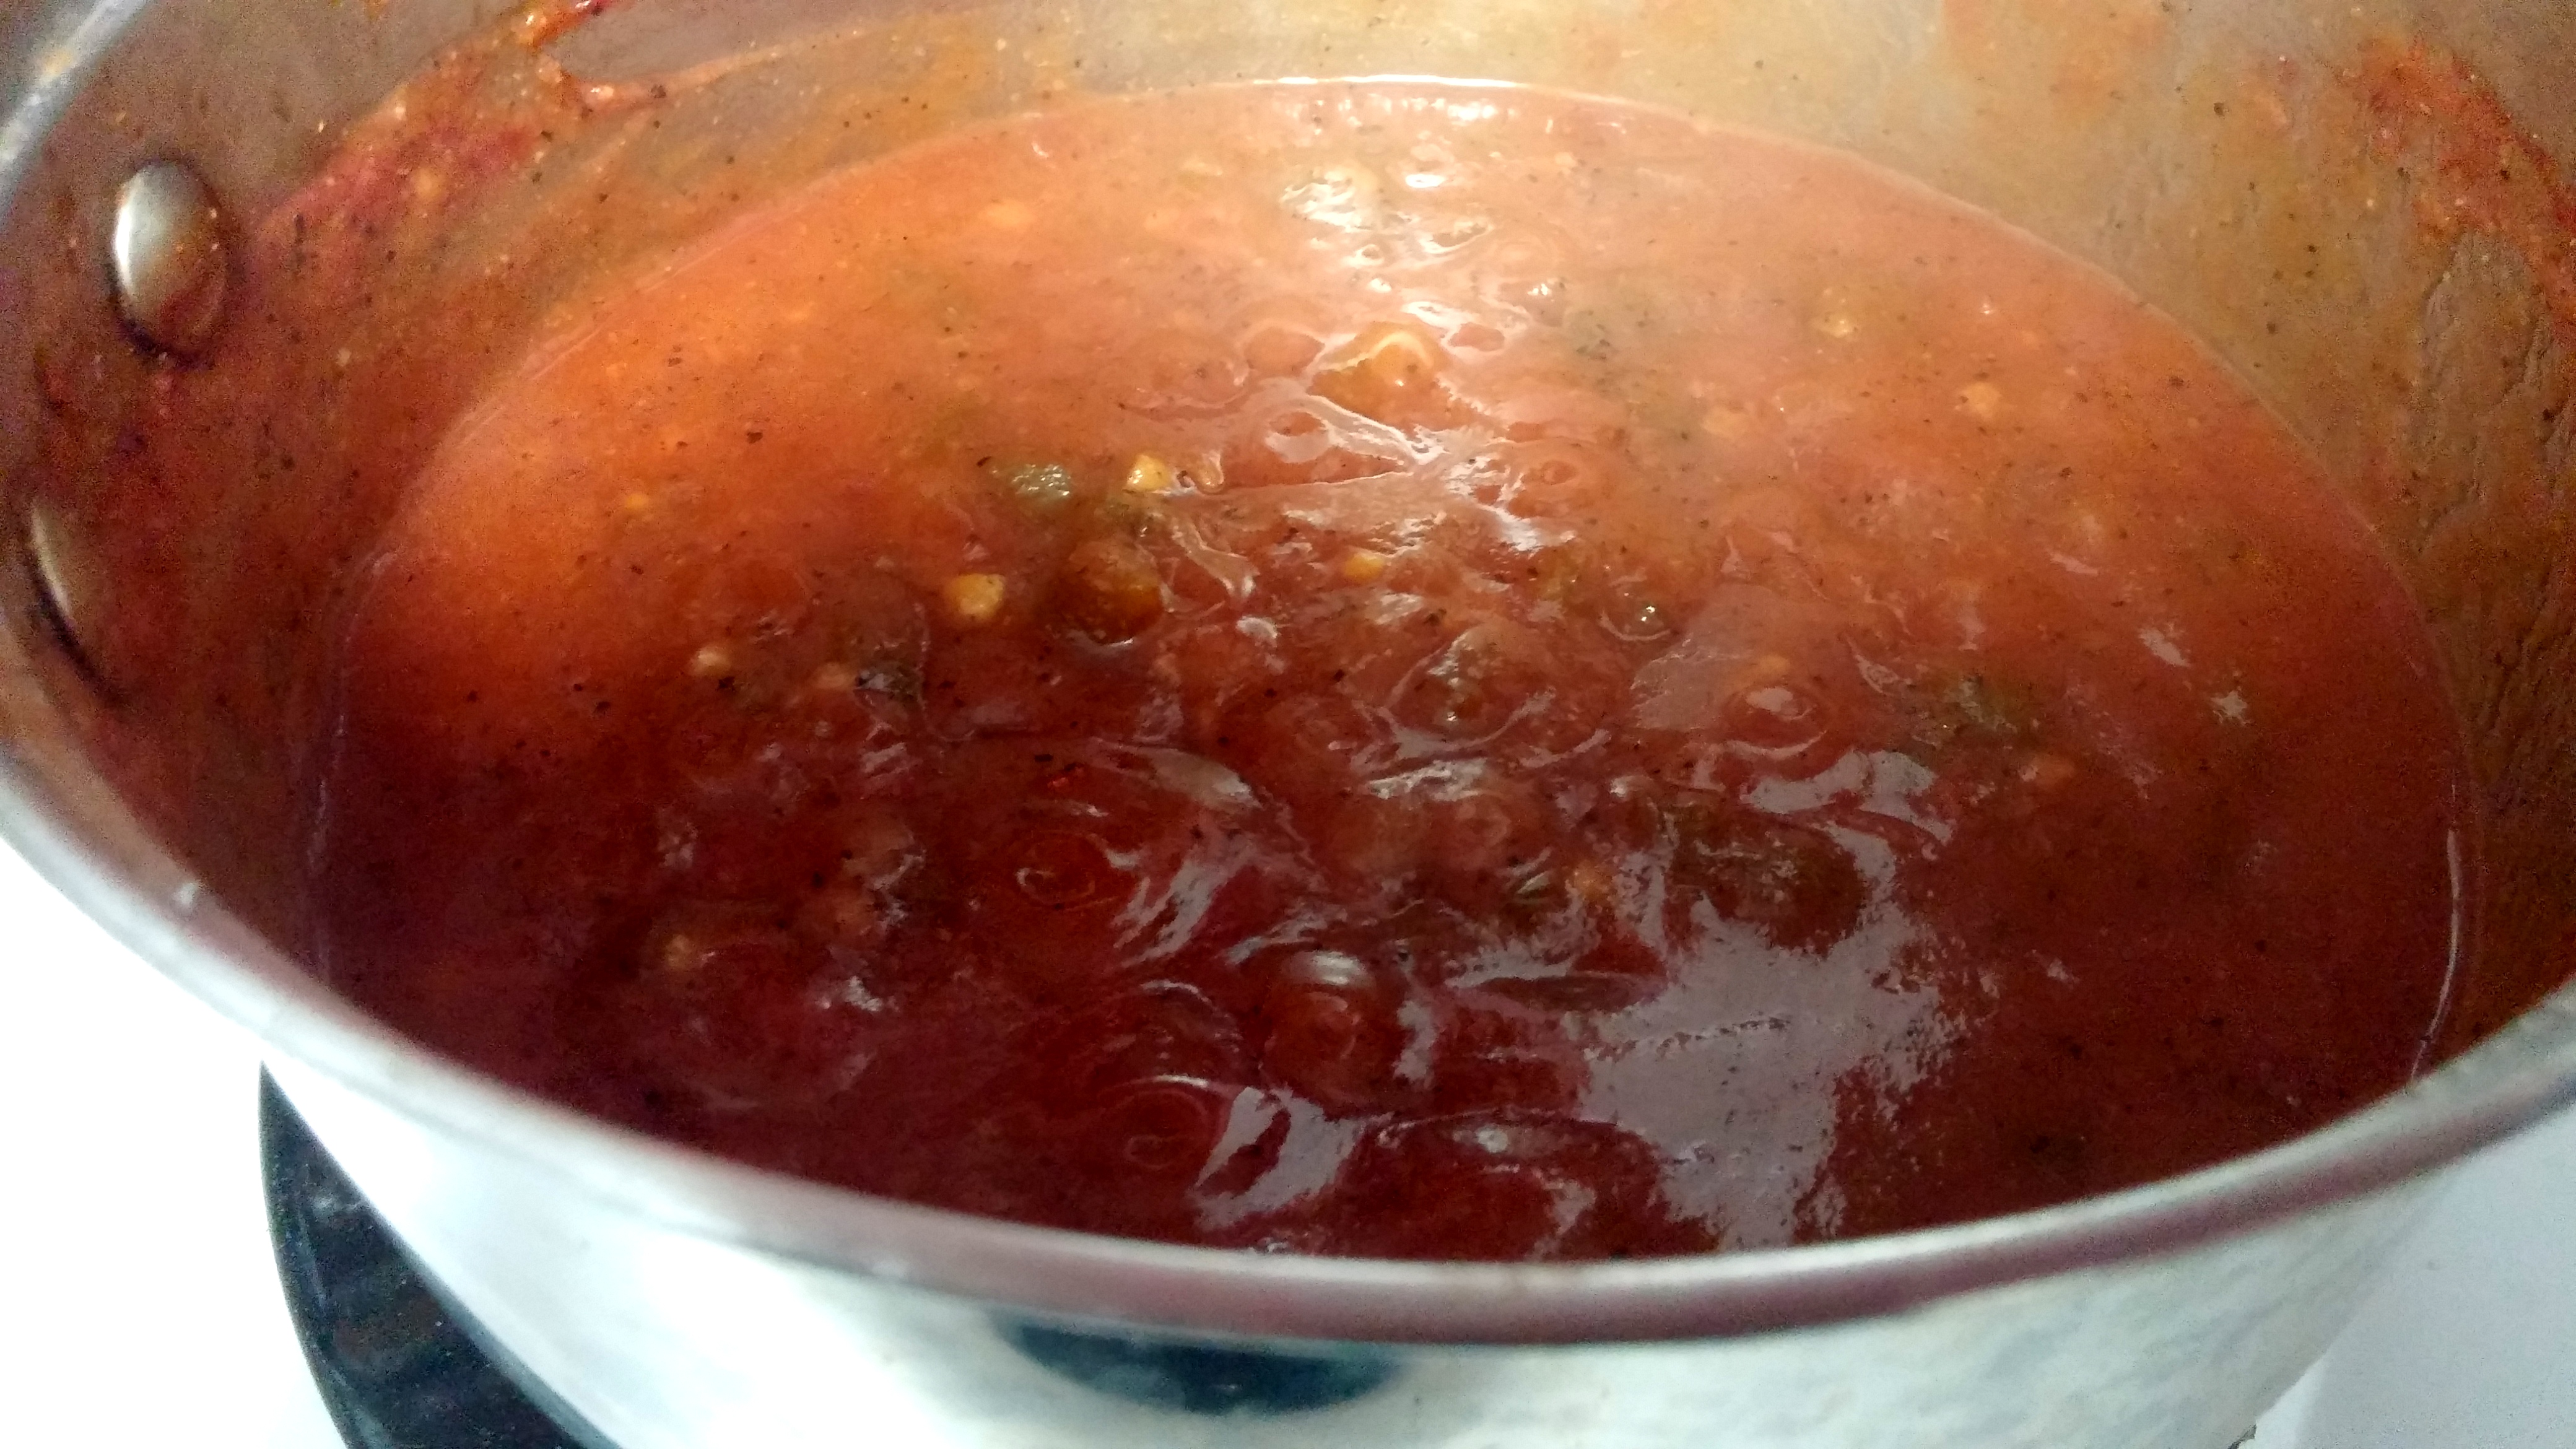
  8. Next, open the 26 oz can of tomato sauce and pour into a saucepan. Add the sauteed onion and garlic. You also want to add 1/2 tablespoon garlic powder, 1/2 tablespoon onion powder, 1 teaspoon dried basil, 1 tablespoon Italian seasoning, and salt and pepper to taste. Bring to a simmer.

unnamed (5)

9. Once the second side of the eggplant has been baked, it’s time to remove it from the  oven. It should look a little something like this:

unnamed (4)

10. Now it’s time for the real fun. Kick up the oven temperature to 400 degrees. While this temperature is preheating, spray a 9 x 13 inch casserole dish with nonstick cooking spray.

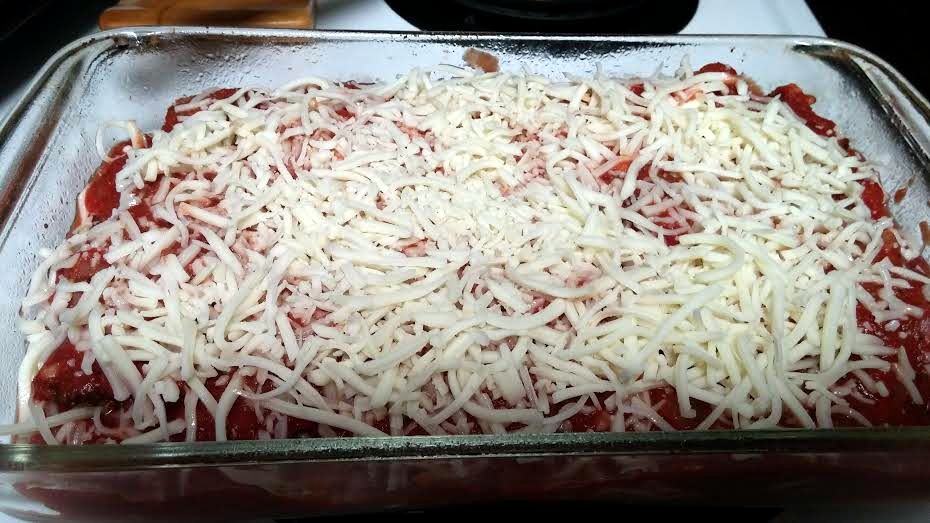
11. Spoon about 3 or 4 tablespoons of the sauce onto the bottom of the dish, and then begin to line the bottom with your first layer of baked eggplant pieces. Once the bottom of the dish is relatively covered with eggplant, pour half of the sauce on top of the eggplant. Once you’ve done that, sprinkle 1 cup of mozzarella cheese on top of the sauce.

12. Repeat the process by adding another layer of eggplant pieces on top of the cheese.

unnamed (1)

13. Then, add another layer of sauce on top of the eggplant. Add the remaining cup of mozzarella cheese on top of the tomato sauce. You should now have the building blocks of baked eggplant Parmesan set into place.

unnamed

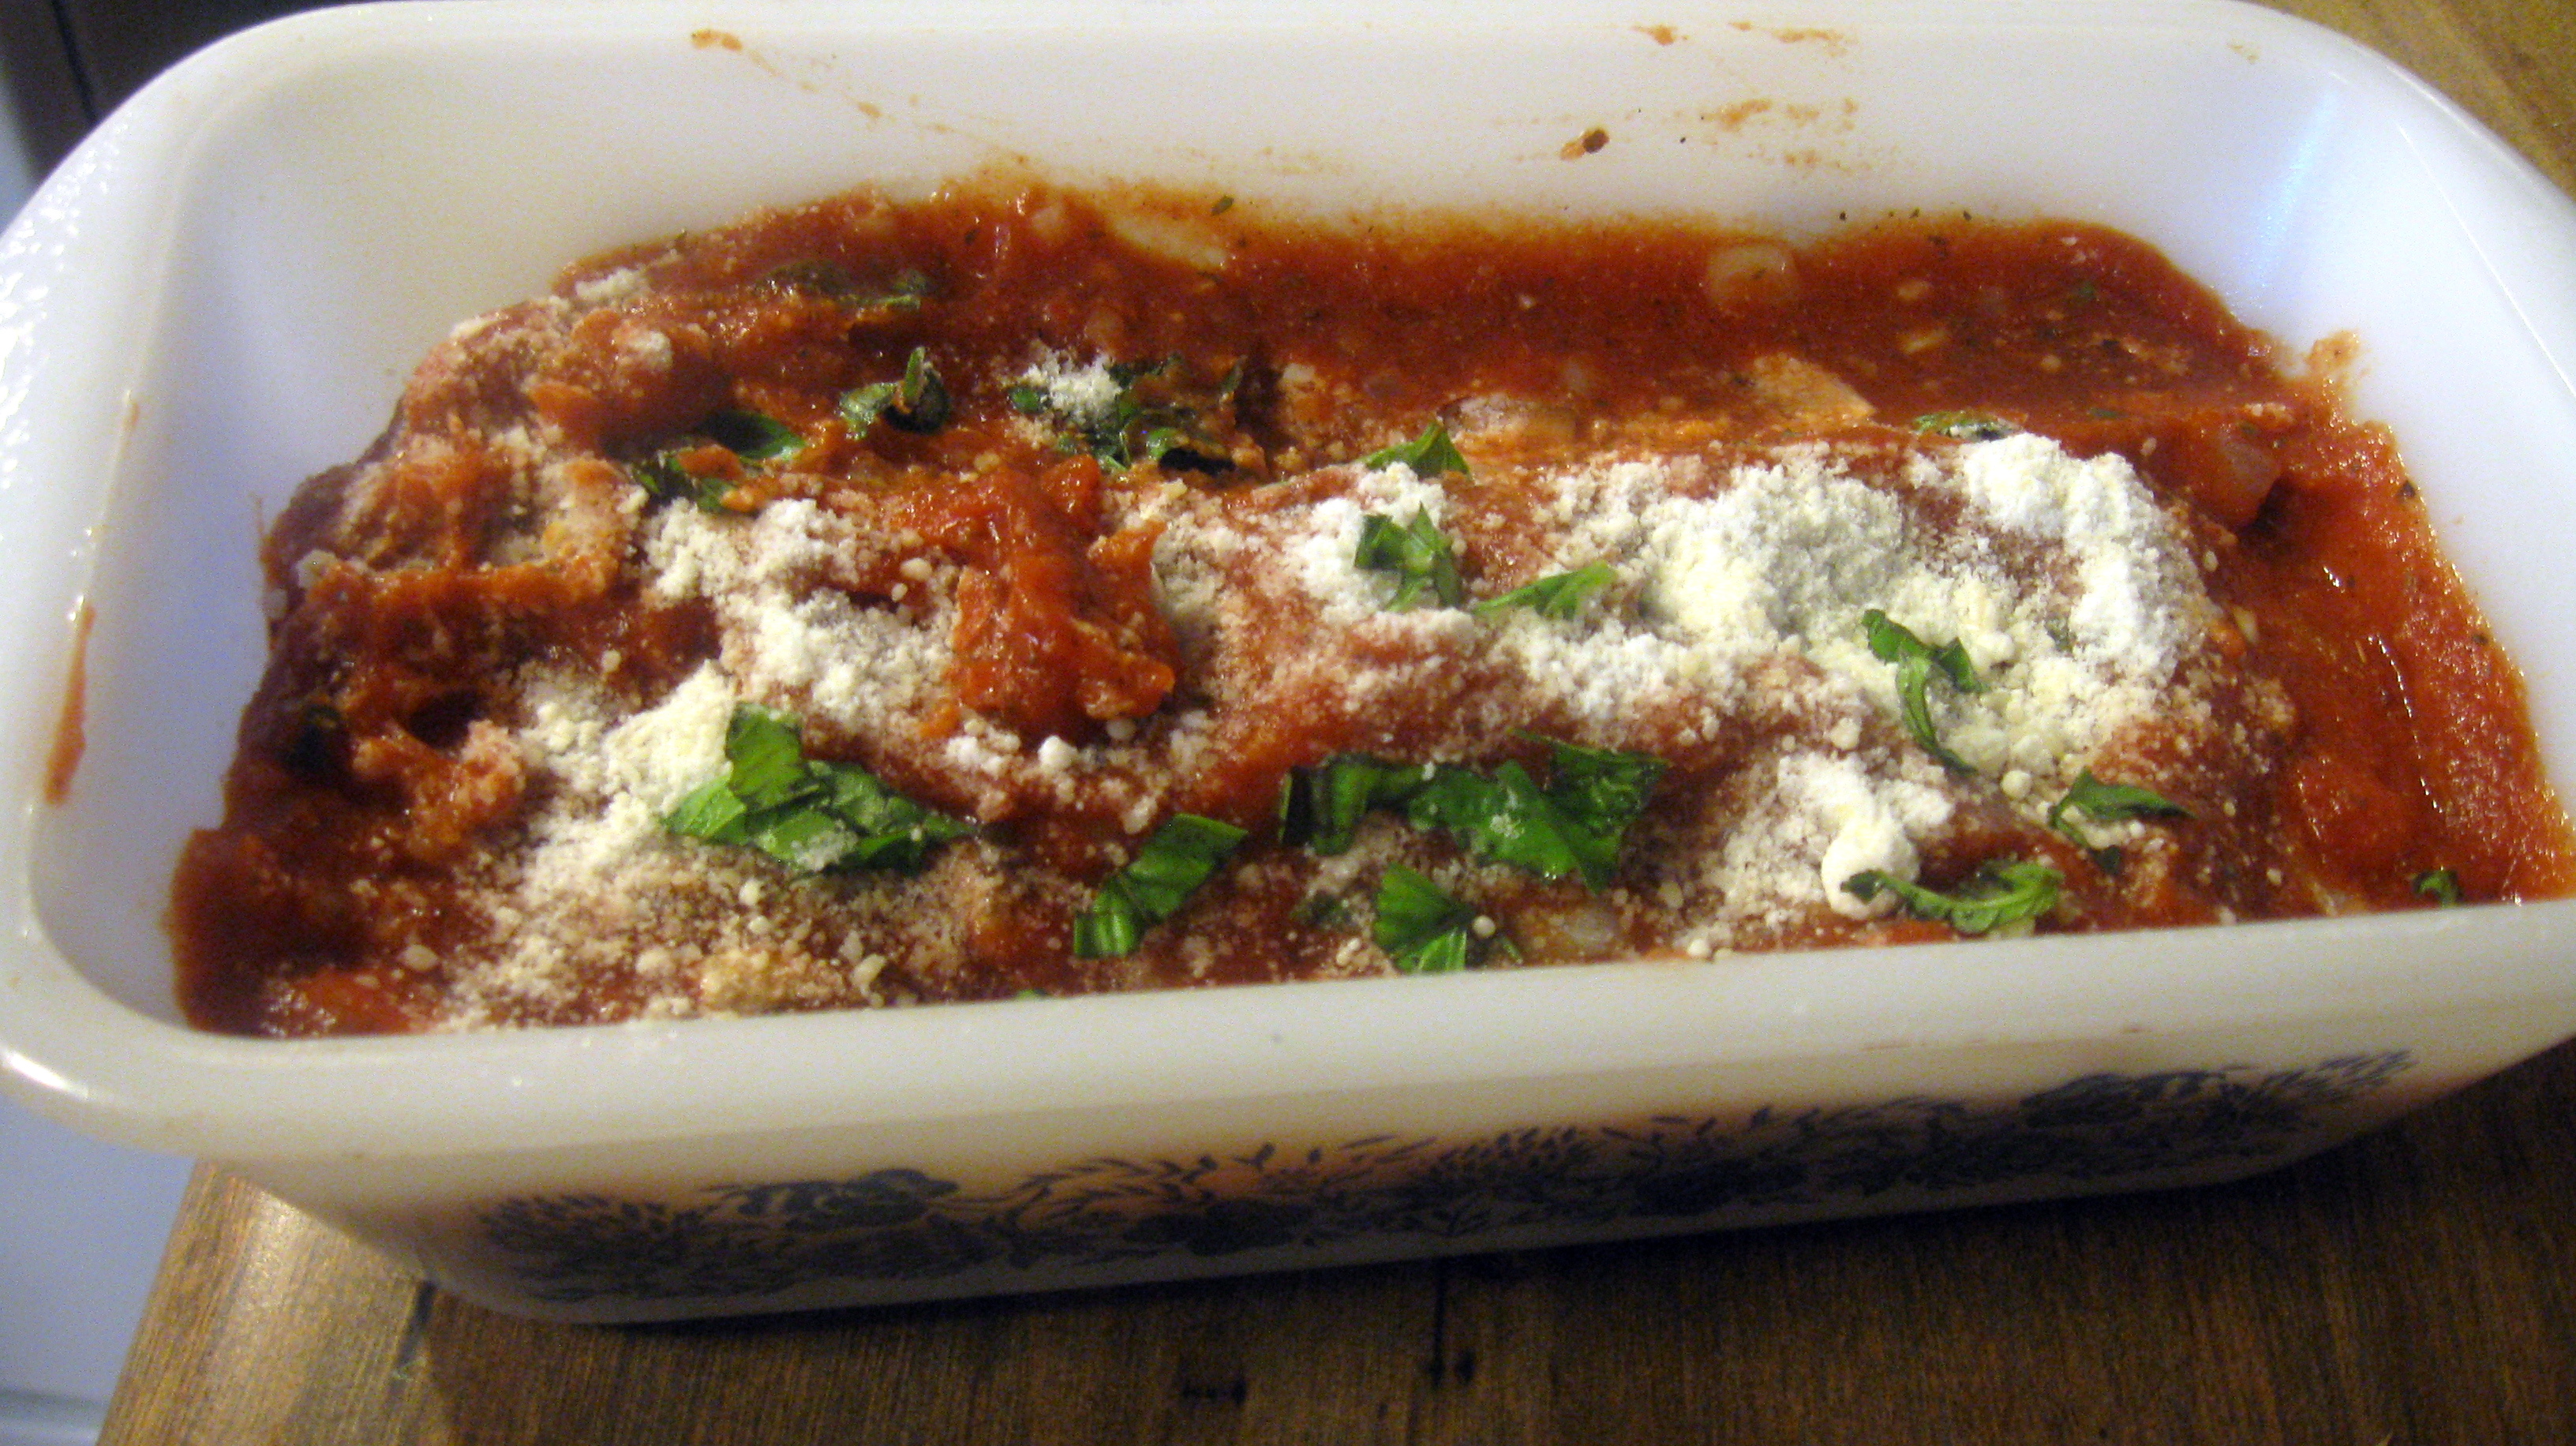
14. Once you’ve built your eggplant Parmesan and the oven is preheated at 400 degrees, place the eggplant Parmesan into the oven and bake for in 15-20 minutes or until the cheese is melted (I baked mine for 17 minutes).

15. Remove from oven, serve, and enjoy!

unnamed (9)

Broiled Seasoned Tofu

unnamed (6)

Prep Time: 10 minutes          Cook time: 20 minutes          Total Time: 30 minutes

About:

Hello, all! Guess what? I’ve got another first! I don’t know why it had never occurred to me to do so, but until a couple of nights ago, I had never thought to broil tofu. I have always baked it, fried it, or grilled it. So, I decided to give broiling tofu a try. And guess what? It’s pretty good! It’s definitely easier to crisp the tofu by broiling it instead of baking it. If you like your tofu crispy like I do, then you’re definitely going to need to try this. This is a pretty basic recipe and can be adapted however you want. It doesn’t take long and it’s very simple.

Ingredients:

1/2 block tofu, drained or pressed

Olive oil

Italian seasoning

Cajun seasoning

Garlic powder

Onion powder

Salt

Pepper

Non-stick cooking spray

Preparation:

  1. If necessary, preheat broiler.
  2. Take your drained, half block of tofu and cut it into long, but thin, slices.
  3. Spray a small baking dish with non-stick cooking spray and fit the tofu pieces into the dish. Arrange the tofu slices so that they do not overlap and are not touching each other.
  4. Drizzle olive oil onto the top of the tofu pieces and brush the olive oil onto the surface of the tofu.
  5.  Sprinkle the top of the coated tofu with Italian seasoning, Cajun seasoning, garlic powder, onion powder, salt, and pepper. This is your call; add however much of each seasoning that you like. I like a lot of seasoning, (as you can probably see from the photos) so I sprinkled the seasonings onto my tofu like a duck on a June Bug (if you’re not from the southern United States you might not get that simile, but that’s OK, I forgive you).
  6. Place the baking dish into the oven and broil for 9 minutes.
  7. After the 9 minutes, remove the baking dish from the oven and flip the tofu. Brush olive oil onto the newly exposed side of tofu. Sprinkle the seasonings onto this side of the tofu as well.
  8. Return the baking dish to the oven and broil for another 9 minutes.
  9. Serve immediately and enjoy! unnamed (3)

Vegetarian Sloppy Joes

20150912_185158

Prep time: 15 minutes          Cook time: 50 minutes          Total time: 65 minutes

About:

Hello, all! I had a craving for one of my childhood favorites the other night. That childhood favorite would be none other than a sloppy joe. Then, I had a realization. I have not had a sloppy joe since I have changed my diet to a vegetarian diet about a year ago. I had a bag of MorningStar soy crumbles in my refrigerator, but instead of grabbing a can of prepared sauce, I decided to make my own. So this was a first! My first vegetarian sloppy joe, and my first homemade sloppy joe sauce. This recipe is relatively easy to make. I enjoyed this sauce much more than any canned sauce I’ve ever had, though it does take more time and it is quite sloppy! But hey, sloppy joes are supposed to be sloppy, right? This sauce makes 4-5 sloppy joes.

Ingredients:

Soy crumbles (I use MorningStar)

3/4 cup water

1  1/4 cup ketchup

3/4 teaspoon Worcestershire sauce

1  1/2 teaspoon beer mustard (Dijon also works)

3  1/4 teaspoons brown sugar

1 teaspoon salt

1/2 teaspoon ground black pepper

1/2 large white onion, chopped

3 garlic cloves, finely chopped

1/2 green bell pepper, chopped

1 small, hot green pepper, seeded and chopped (optional)

Non-stick cooking spray

Preparation:

  1. Chop the onion, garlic, green bell pepper, and small, hot green pepper (the small, hot green pepper is optional and depends on whether or not you want the sauce to be spicy).
  2. Once everything is chopped, spray a medium sized saucepan with non-stick cooking spray (including the sides). Place the onion, garlic, and peppers into the saucepan. Heat to medium high and let them simmer until the onion is translucent and the garlic is fragrant.
  3. Add only 1/2 cup of the 3/4 cup of water, but add all of the ketchup, Worcestershire sauce, beer or Dijon mustard, brown sugar, and salt and pepper that is called for into the saucepan. Stir and bring this to a boil.
  4. Once the sauce is brought to a boil, reduce heat to a simmer and cover. Let the sauce simmer for 40 minutes, stirring every 10 minutes or so.

20150912_183653

5. Once the sauce has been simmering for about 30 minutes, get out your soy crumbles and arm yourself with a skillet. Add the remaining 1/4 cup water to the skillet, and then toss in enough soy crumbles to feed you and whomever else you might be feeding. Bring the heat to medium high until the soy crumbles are thawed.

6. Once the crumbles are thawed and the sauce has been simmering for at least 40 minutes, spoon the sauce into the soy crumbles. If you like your sloppy joes extra sloppy, add more sauce. If you like them neat, add less.

20150912_185031

7. Serve on a bun with your favorite toppings and enjoy!

Mexican Pasta Skillet

unnamed (1)

About:

Hello again, everyone! It has been a while since my last post, so I feel the need to explain why. My husband and I moved from our apartment to our first house, so I’ve been crazy busy here lately! Anyways, this dish is relatively easy to make. There’s really not much to it, which is perfect for busy days!

Ingredients:

2 cups rotini pasta

1 cup dry black beans

1 1/4 cup water

1 (8 oz.) can tomato sauce

1 (14.5 oz.) can diced tomatoes

1 packet taco seasoning (any brand)

4 cloves garlic, finely chopped

1 small or medium yellow onion, chopped

3-4 small green cayenne peppers, seeded and chopped

1 tablespoon oregano

1 tablespoon cumin

1/2 tablespoon Italian seasoning

1/4 tablespoon Cajun seasoning

1/2 tablespoon paprika

Salt and pepper to taste (a lot of pepper)

Non-stick cooking spray

Preparation:

  1. Cook the dry black beans according to the directions on the bag. The amount of water should be specified.
  2. After the beans have been cooking for about an hour, cook the pasta according to the instructions on the box. Again, the amount of water should be specified.
  3. While the beans and pasta are cooking, chop the garlic and onion. Chop and seed the peppers as well.
  4. Once the pasta and beans are tender, spray a large skillet with non-stick cooking spray. Add the garlic, onion, and peppers. Saute them for about 5 minutes or until the onion is clear and the garlic is fragrant.
  5. Remove the pasta and beans from heat. Using a slotted spoon, drain and add the pasta to the skillet one spoonful at a time. Use the slotted spoon to drain and add the black beans to the skillet as well.
  6. Add the water, tomato sauce, diced tomatoes, taco seasoning, oregano, Italian seasoning, cumin, paprika, Cajun seasoning, and salt and pepper to the skillet. Stir well.
  7. Bring the contents in the skillet to a boil and then reduce heat to a simmer. Let it simmer for 10 to 15 minutes.
  8. Top with your favorite toppings (I recommend sour cream and cheese), and enjoy!

Mushroom Rotini Pasta Bake

IMG_0846

           Prep time: 25 minutes        Bake time: 25 minutes        Total time: 50 minutes

About:

        I just noticed that I haven’t posted anything relatively Italian on my blog yet! Shame on me, considering how much I eat it! This recipe is easy to make and is also easy to customize to fit your own taste. In this recipe, the sauce is made from a McCormick package because I was too lazy that day to make my own sauce. You may use your own sauce, or a jar of sauce, or any type of spaghetti sauce that you like. You may also replace the mushrooms with soy crumbles. The peppers are optional, but they were growing in my garden so I threw them in there. They add some heat, but not too much. I hope you enjoy.

Ingredients:

2 cups rotini pasta

1 package McCormick spaghetti sauce

1 (6 ounce) can tomato paste

3 large garlic cloves, finely chopped

1/2 large white onion, chopped

2 1/2 tablespoons fresh basil, chopped

10 baby bella mushrooms, chopped

2 (small) green cayenne peppers (optional)

1 tablespoon garlic powder

1 tablespoon onion powder

1/2 teaspoon oregano

1 tablespoon Italian salad dressing

1 3/4 cup water

A few sprinkles of dried rosemary

Parmesan cheese to taste

Salt and pepper to taste

Non-stick cooking spray

Preparation:

  1. Preheat oven to 350.
  2. Bring a pot of water to a boil for the pasta. In the meantime, chop the garlic, onion, mushrooms, peppers, and fresh basil.
  3. While the water for the pasta is being brought to a boil, follow the directions on the back of the McCormick package to create the sauce. Add the water, seasoning from the package, tomato paste, and Italian salad dressing (I know it says oil or butter in the directions, but trust me on this one) into a saucepan. Add the chopped garlic, chopped onion, garlic powder, peppers, onion powder, oregano, rosemary, salt, pepper, and half of the fresh basil to the sauce. Stir this in and bring this to a boil.
  4. Once the water for the pasta is at a boil, add the 2 cups of rotini pasta to the water.
  5. Once the sauce has been brought to a boil, reduce from heat and let simmer about 3-5 minutes. Hint: check on the pasta while the sauce is cooking. You’ll probably have to multi-task.
  6. Once the pasta has cooked (about 7-10 minutes, but check it first), remove from heat and drain.
  7. Grease the inside of a baking dish (I used a small casserole dish) with non-stick cooking spray.
  8. Once the oven is preheated, add the drained noodles to the bottom of the baking dish. Then, add the chopped mushrooms. Pour the sauce over the chopped mushrooms. Stir everything together. Top with Parmesan cheese and the rest of the basil.
  9. Place into the oven and let it bake for 25 minutes.
  10. Enjoy!

IMG_0848

Homemade Dill Pickles

IMG_0826

About:

        So I started a garden this year, and it has actually done well! At first my cucumbers weren’t doing anything, but suddenly, one day, BOOM! Cucumbers everywhere. I’ve eaten more cucumber sandwiches than anything this summer, but being the only one who will eat cucumbers in my household (my husband is a pickier eater than a 4 year old), I still couldn’t keep up. So I decided to pickle them. I’m a pickle fiend and I’m picky about pickles, but homemade pickles are the best! These are great as a snack or as a side (I like to eat pickles with soup). So if you love pickles, give these a try!

Prep time: 20 minutes

Refrigeration time: 4 days

Total time: 4 days 20 minutes

What You’ll Need:

A glass jar with a tight seal (I used a 64 ounce mason jar, Ball brand)

6 or 7 large cucumbers

4 fresh heads of dill (I used 2 large and 2 small)

3 or 4 large cloves of garlic chopped (amount depends on taste)

1/4 large onion, chopped

1  1/3 cup white vinegar

3 1/2 cups water

1 tablespoon sugar

1 tablespoon salt

Preparation:

1. Bring the vinegar, water, salt, and sugar to a boil, stirring occasionally. After the mixture has been boiling about 2 minutes, remove from heat and allow it to cool.

2. While the vinegar, water, salt, and sugar mixture is cooling, prep your cucumbers, garlic, and onion. You can cut the cucumbers into spears or chips, depending on your own preference. I cut mine into spears. Chop the onion and garlic as well.

IMG_0820

3. After cutting your cucumbers, onion, and garlic, place them into a 64 ounce jar. I put half of the onion at the bottom, filled the jar with cucumbers, sprinkled the garlic in, and put the rest of the onion in.

4. Next, add the fresh dill to the jar. I used 2 large heads and 2 small, but you can use about 3 large if you like. Try to wiggle the dill in different places. Don’t stick all of the dill in one part of the jar.

5. Once the vinegar, water, salt and sugar mixture has cooled, carefully pour it into the jar. I used a funnel to make this easier.

6. Seal the jar tightly and place into your refrigerator. Allow the pickles to refrigerate for 4 days before you eat them.

7. Eat them! 😀

IMG_0862

Refrigerated jar sans 7 or 8 spears 😛

Chick Pea and Red Lentil Stew

IMG_0812

About:

I don’t know what’s wrong with me. I live in the heart of the southern United States where the heat index has been 109 degrees Fahrenheit over the last couple of weeks, with the occasional 105 degrees. What have I been eating? Soups and stews. Hot soups and stews. This is a great slow-cooker recipe to use on cold (or blistering hot) days. This recipe is an easy throw it in the pot and forget it kind of recipe. I used rice leftover from the night before, so the rice that is called for is already cooked. If you haven’t already cooked the rice, this will add to the prep time a little bit. Every ingredient in this recipe is good for you, (unless you have an allergy, then it’s not very good for you) so you can feel healthy as you eat it!

Prep Time: 15 minutes       Cook Time: 5 hours       Total Time: 5 hours 15 minutes

Ingredients:

1 cup chick peas (dry)

1/2 cup red lentils (dry)

3/4 cups brown rice, cooked

4 cups vegetable stock or broth

1 1/2 cup water

2 cans diced tomatoes

3-4 bay leaves

3 large garlic cloves, chopped

1/2 large onion

1/4 cup celery, chopped

1/4 cup carrots, chopped

1 yellow squash, diced

1/2 cup frozen green peas

1/2 teaspoon white pepper

1 teaspoon black pepper

1 teaspoon salt

1/2 teaspoon paprika

1/2 teaspoon sage

1/2 teaspoon garlic powder

3/4 teaspoon cumin

1 tablespoon soy sauce

1 tablespoon tomato paste

Pinches of rosemary

Preparation:

1. If you haven’t already, cook the brown rice and chop the garlic, onion, carrots, celery, and squash.

2. Once the rice has cooked and your vegetables are chopped, throw everything into a slow cooker. Turn the heat on the slow cooker between medium and high and let it cook for about 5 hours, stirring every hour or so.

3. Serve and enjoy!